Set Access Control for the Microsoft Entra ID (formerly AAD) application
V8.0
A user will need to provide Access Control to an Application for the application to manage the user’s Azure Services (Key Vault, DNS Zone and App Services) in a Subscription.
-
Go to Azure Subscriptions, and open the subscription that contains your Azure Key Vault, DNS Zone, App Services, etc.
-
In the subscription, click on ‘Access control (IAM)’ and add a new role assignment
-
Click on the Privileged administrator role link
-
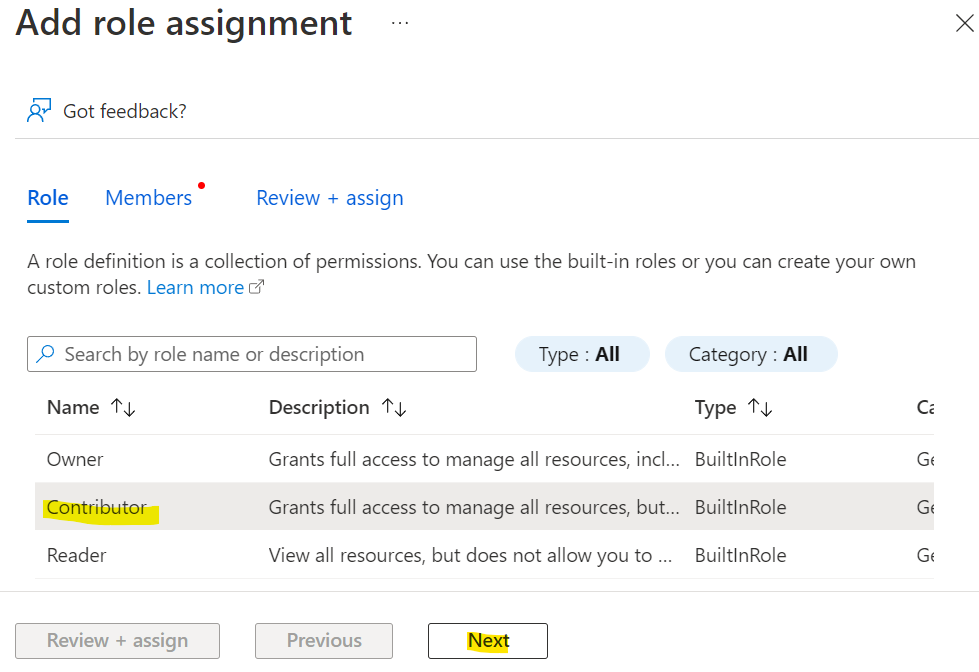
Select the ‘Contributor’ role and click the ‘Next’ button
-
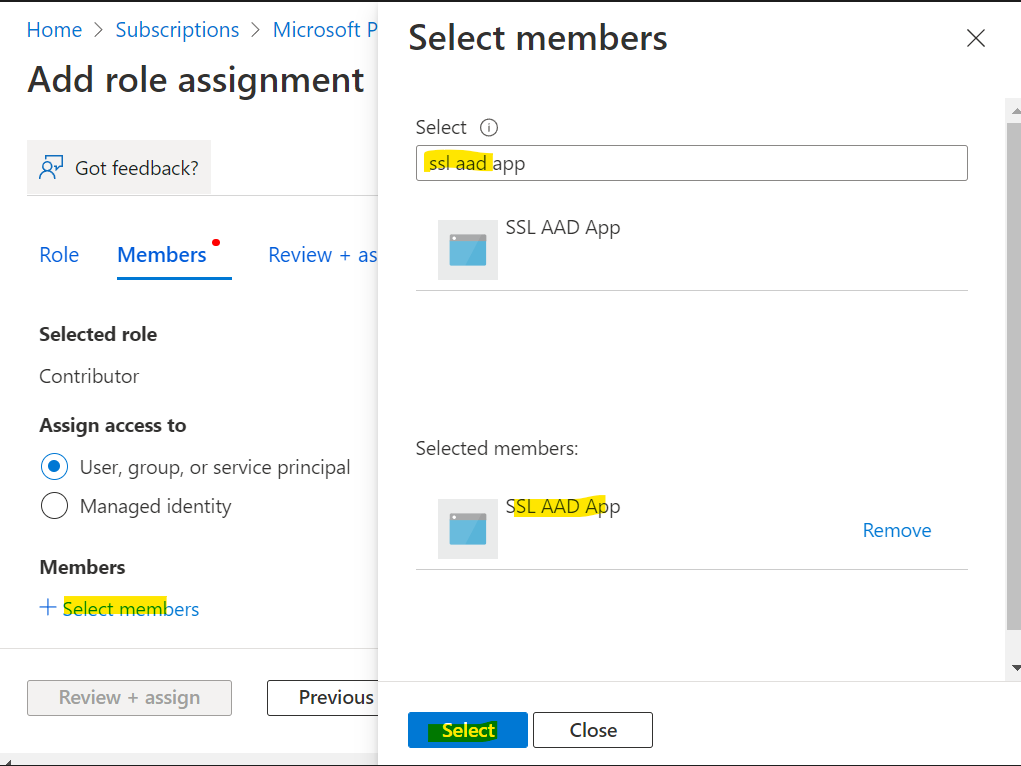
Assign access to : ‘User, groups or service principal’ and click the ‘Select members’ link
-
Search for the Microsoft Entra ID App that was registered and select it. (If you did not register an app previously, please follow the instruction in this link : Registering an Application)
- Click the ‘Review + assign’ button
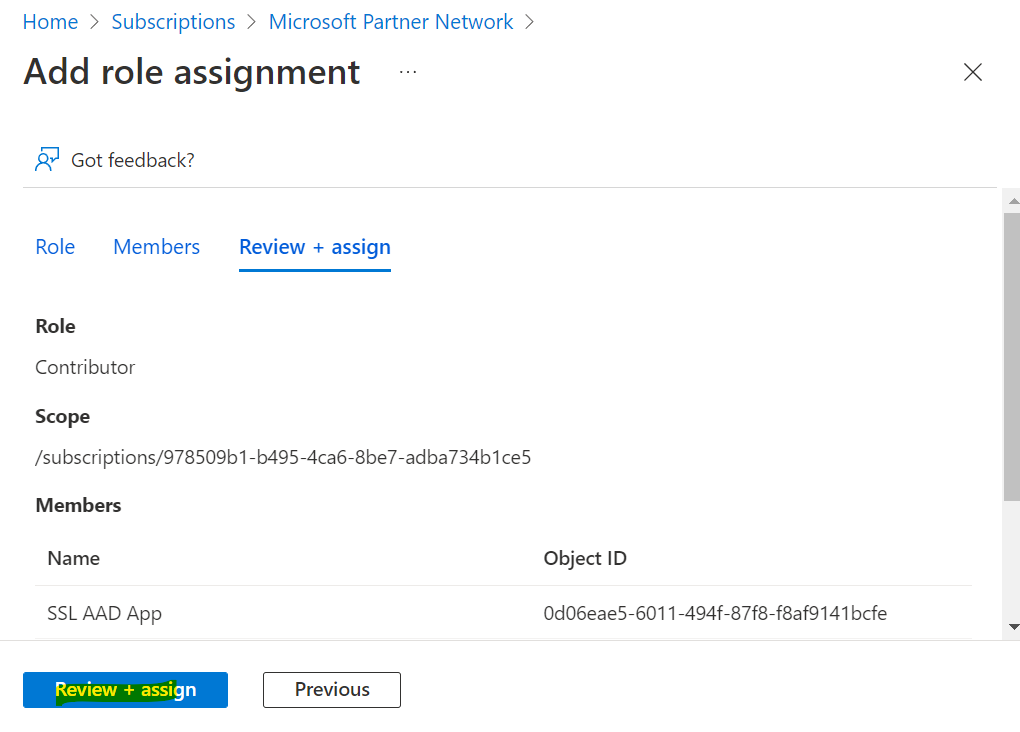
- In the ‘Role assignments’ tab, you will see the new role assignment you just added
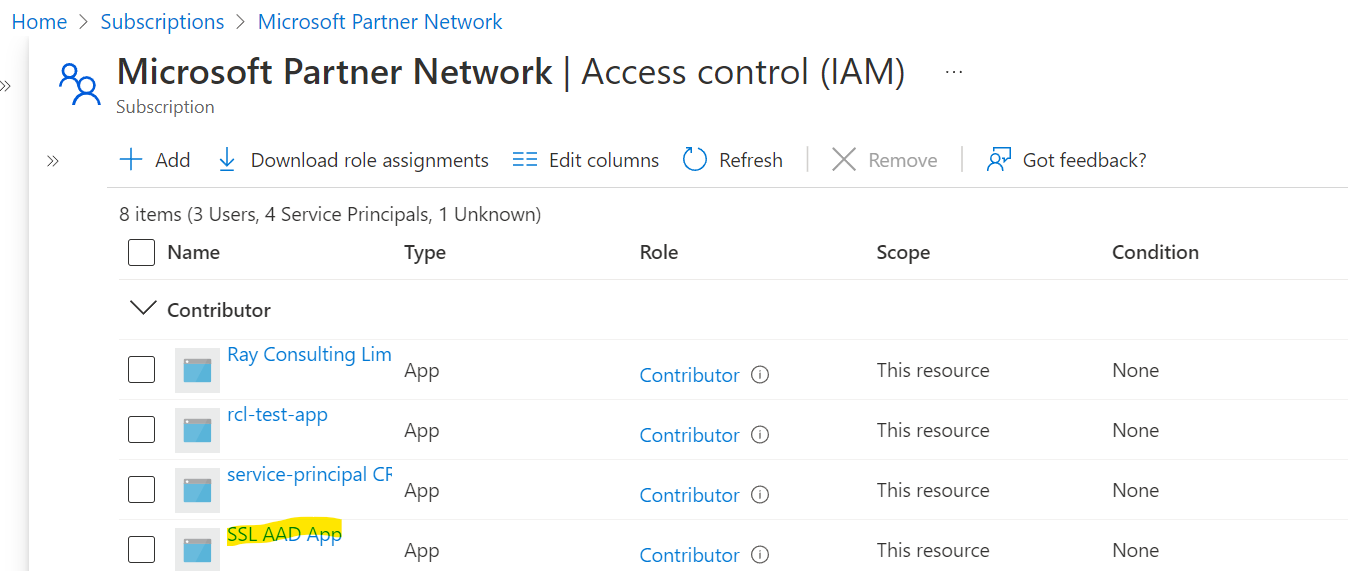
You must repeat these steps for each Azure Subscription to access Azure Resources.
Access Policies for Key Vault
If SSL/TLS certificates are being created for Azure Key Vault, you will need to set Access policies for the certificate in Key Vault.
This step is not required, if SSL/TLS certificates are not being created for Key Vault.
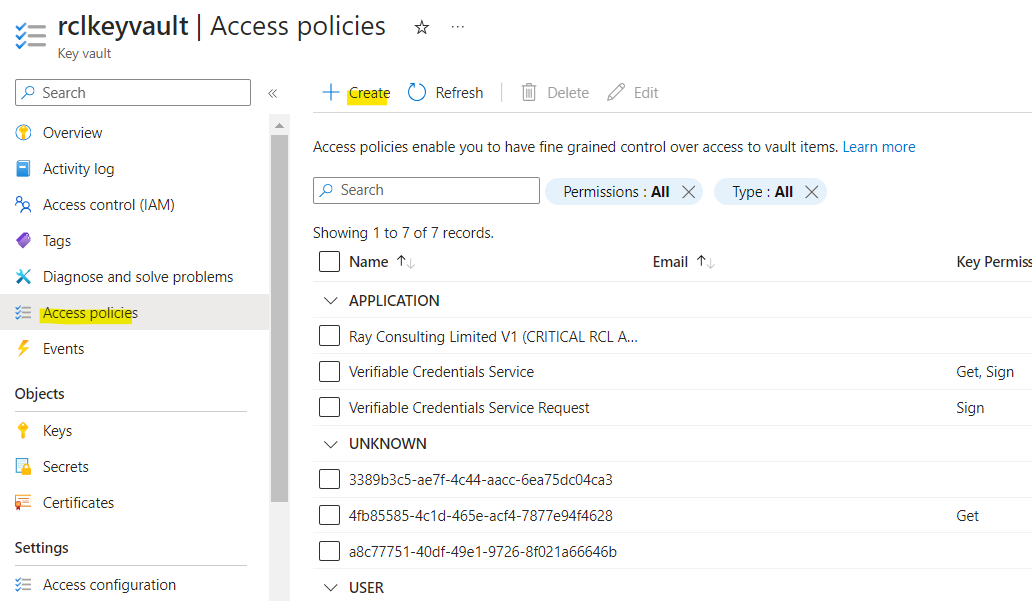
- In your Azure Key Vault, click on the ‘Access policies’ link. Then click on ‘Create’.
-
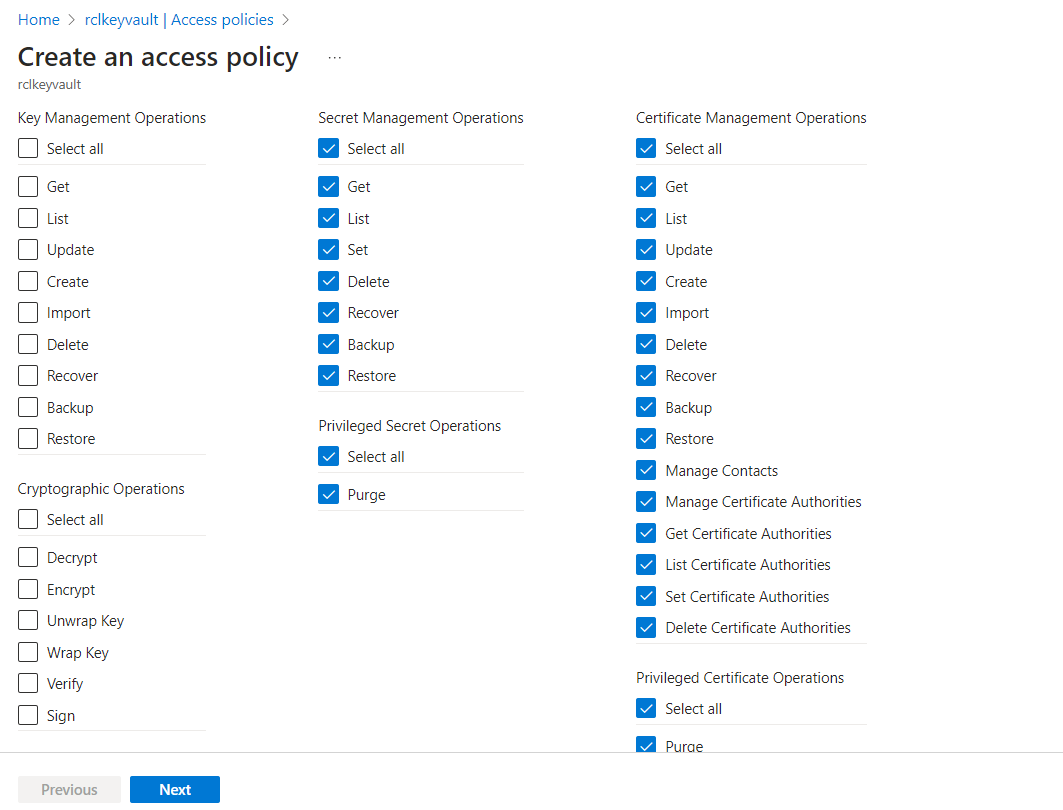
Select all the permissions for the ‘Certificate Management Operations’ (select all). Ensure you include the purge permission.
-
Select all the permissions for the ‘Secret Management Operations’ (select all). Ensure you include the purge permission.
-
Click the ‘Next’ button when you are done
-
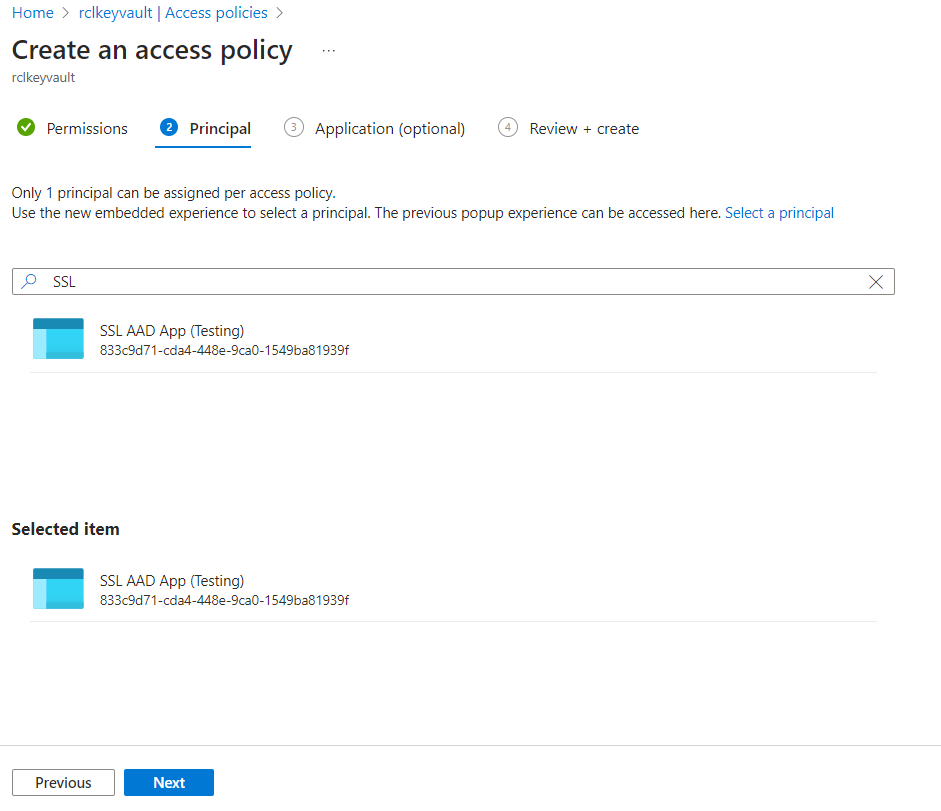
Select a service principal : search for the Microsoft Entra ID application you use created previously
-
Click the ‘Next’ button
-
Click the ‘Create’ button when you are done
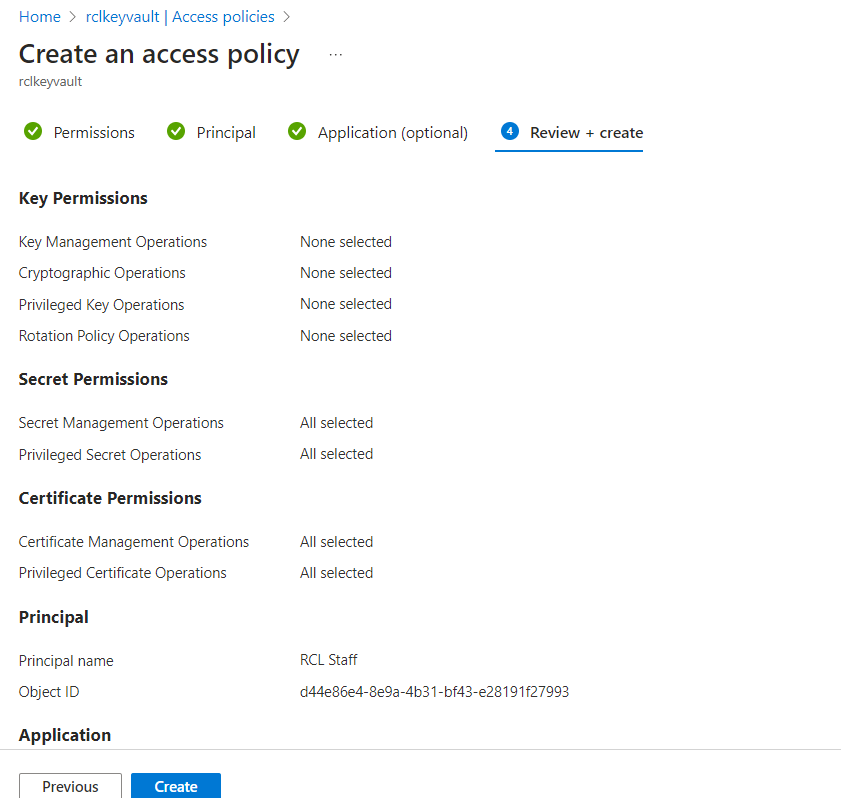
- The newly added access policy will be displayed


