Creating Stand Alone SSL/TLS Certificates
V8.0
In the RCL SSL Portal, you can create Stand Alone single-domain SSL/TLS certificates using HTTP and DNS challenges. Your domain can be hosted with any domain registrar.
You will need to download and install the certificate in your web server. The following web servers are supported :
- Apache
- Apache Tomcat
- NGINX
- IIS
- cPanel, Plesk, etc
- Any hosting system that supports the upload of SSL/TLS certificates

You can create a SSL/TLS certificate by using either the :
- HTTP Challenge or
- DNS Challenge
Manual Certificate Renewal
When a certificate is close to expiration, you should delete the certificate and create a new one. Then, install the renewed certificate in your web server.
Create a SSL/TLS Certificate using HTTP
The RCL SSL Portal uses the HTTP-01 challenge type to issue certificates for :
- primary domains (e.g. contoso.net)
- subdomains (e.g. store.contoso.net, www.contoso.net, etc.)
To validate your domain with the HTTP challenge, you will be required to place a file in the root of your website and ensure that this file can be accessed publicly on the web.
Wildcard subdomains (e.g. *.contoso.net) are NOT supported with the HTTP-01 challenge type.
Create a SSL/TLS Certificate
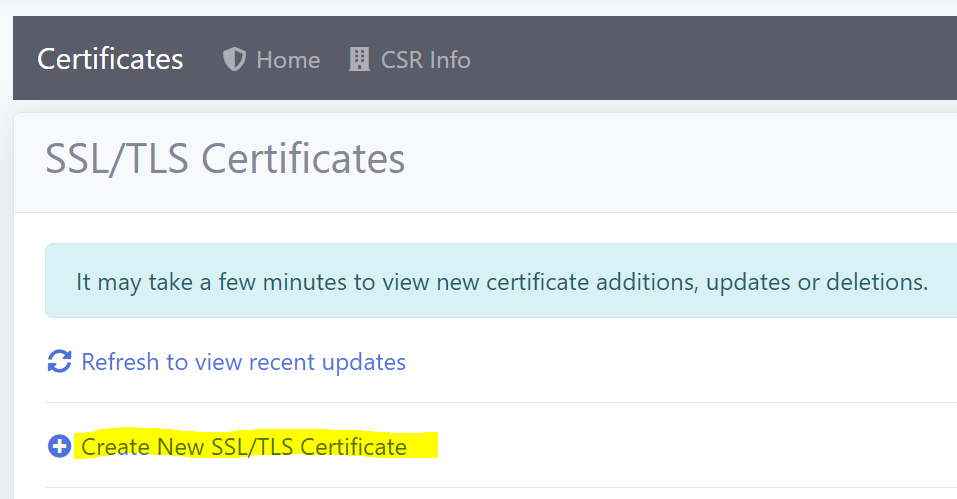
- In the ‘Certificates’ module of the portal, click on the Create New SSL/TLS Certificate link
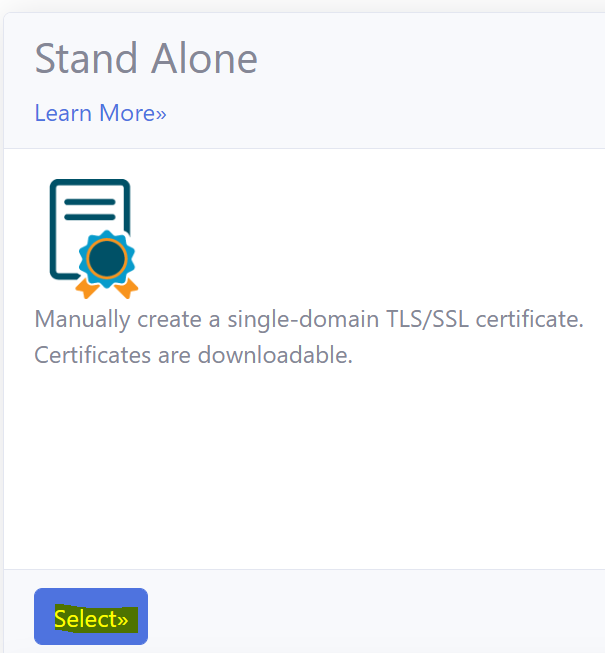
- Select the Stand Alone Certificate option
-
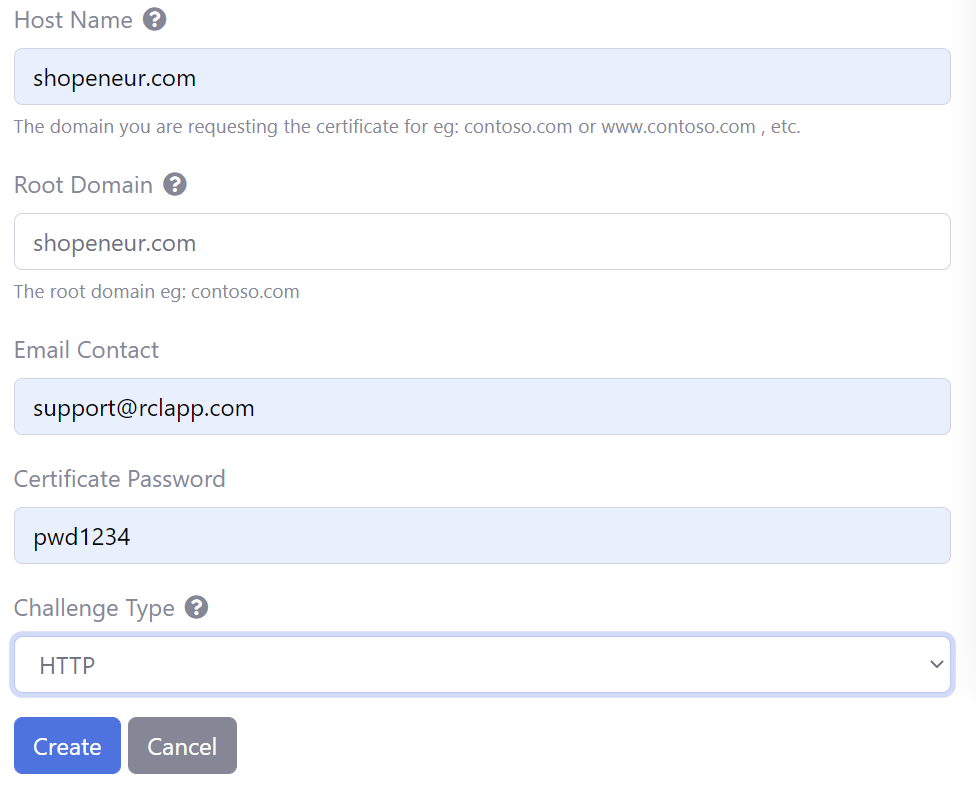
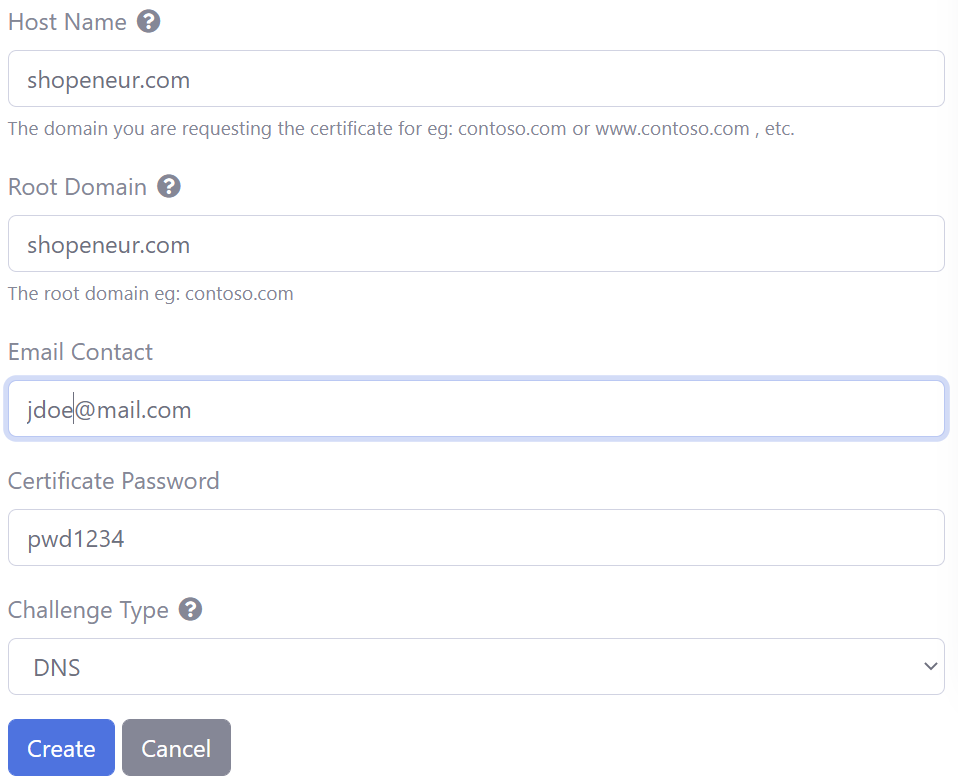
Add the data to create the certificate. The image below illustrates data for a sample site.
-
The Host Name is the primary domain (eg: contoso.com) or subdomain (eg: www.contoso.com) that your are requesting the SSL/TLS certificate for.
-
In this case, we are requesting a SSL/TLS certificate for the primary domain, ‘shopeneur.com’
-
The root domain is the ‘apex’ domain. For instance, the root domain for the hostname: ‘shop.contoso.com’ is ‘contoso.com’. Similarly, the root domain for the hostname : ‘contoso.com’ is ‘contoso.com’ and ‘*.contoso.com’ is ‘contoso.com’.
-
-
The website must exist at the domain you entered, eg. in our example, the website can be accessed publicly on the web at ‘http://shopeneur.com’ in a web browser.
-
Click the Create button when you are done
Completing the HTTP Challenge
-
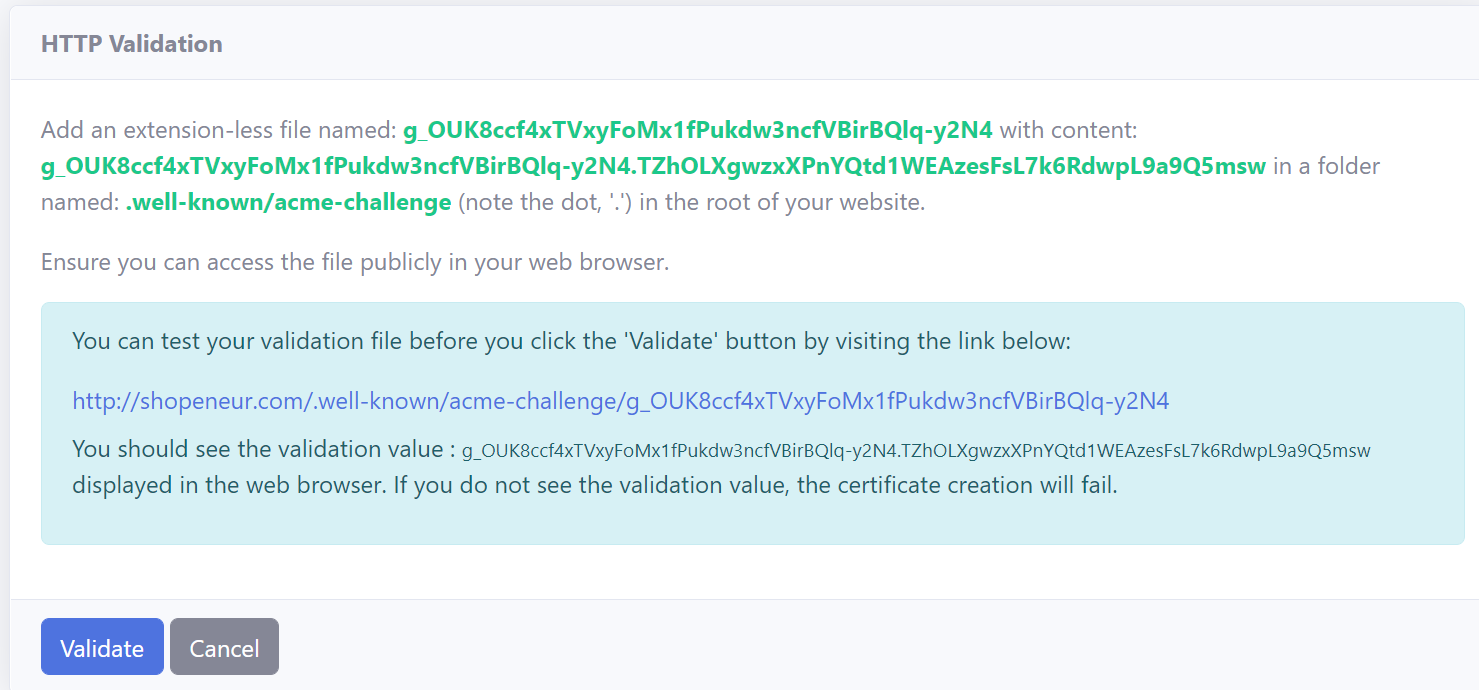
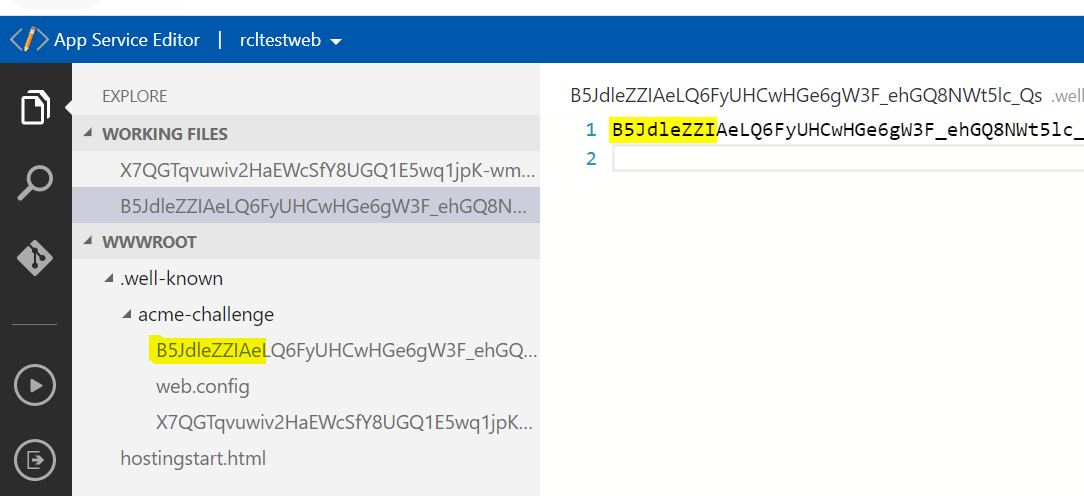
In your hosted website, you will need to create a folder named: .well-known/acme-challenge (note the dot at the start) in the root of your website.
-
Add a extension-less file with the file name identified in the HTTP Validation page. To this file, add the file content identified in the HTTP Validation Page.
Note: - In Windows, you must remove the extension on the validation file. It should not contain a .txt or other file name extension.
- The following example image illustrates the file in the web root directory
Note: - for sites hosted in a Windows Server in IIS, extension-less files are not served by default. To solve this, add the following web.config file to the acme-challenge folder.
<configuration>
    <system.webServer>
        <staticContent>
            <mimeMap fileExtension="." mimeType="text/plain"/>
        </staticContent>
    </system.webServer>
</configuration>
-
Ensure the website and ‘well known’ file can be accessed publicly on the web. On the HTTP Validation Page, click on the link to test your validation file
-
For a successful test, you should see the validation value in the web browser.

- If the test is successful, click the ‘Validate’ button. If the test is not successful the certificate creation will fail.
Certificate Creation
- You will need to wait up to 10 mins to validate the site and create the certificate. When this is done, the SSL/TLS certificate will be displayed in the certificates list.
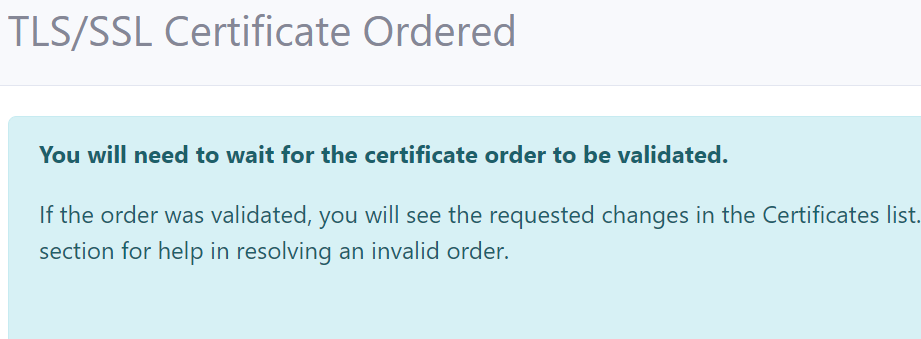
- When this is done, the SSL/TLS certificate will be displayed in the certificates list.

- You can download the SSL/TLS certificate or the relevant certificates files for installation in your webserver is the Certificate Details page.
Create a SSL/TLS Certificate using DNS
The RCL SSL Portal uses the DNS-01 challenge type to issue certificates for :
- primary domains (e.g. contoso.net)
- subdomains (e.g. store.contoso.net, www.contoso.net, etc.)
- wild card subdomains (e.g. *.contoso.net)
To validate your domain with the DNS challenge, you will be required to add a DNS TXT Record to your domain settings with your domain provider.
Add a SSL/TLS Certificate
- In the ‘Certificates’ module of the RCL SSL Portal , click on the ‘Create New SSL/TLS Certificate’ link.
- Select the Stand Alone Certificate option
-
Add the data to create the certificate. The image below illustrates sample data.
-
The ‘Host Name’ is the primary domain (eg. contoso.com), subdomain (eg. shop.contoso.com) or wildcard subdomain (eg. *.contoso.com) that your are requesting the SSL/TLS certificate for.
-
In this case, we are requesting a SSL/TLS certificate for the custom primary domain, ‘shopeneur.com’.
-
The root domain is the ‘apex’ domain. For instance, the root domain for the hostname: ‘shop.contoso.com’ is ‘contoso.com’. Similarly, the root domain for the hostname : ‘contoso.com’ is ‘contoso.com’.
- Click the ‘Create’ button when you are done
Completing the DNS Challenge
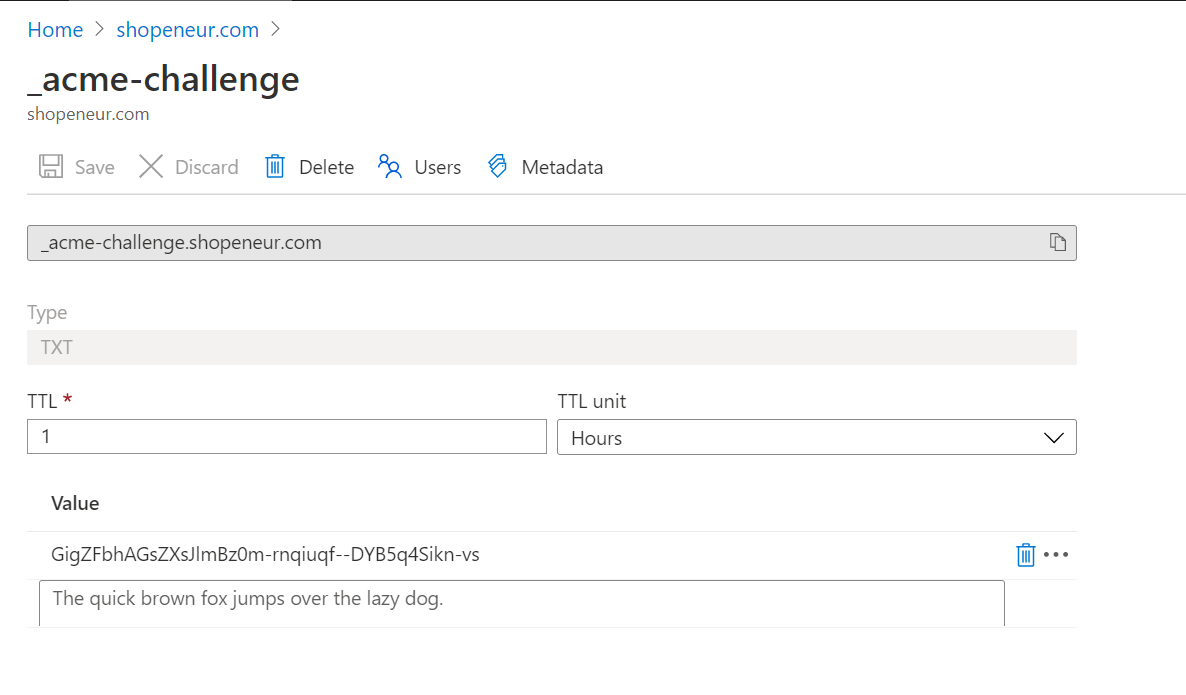
- In your management portal from your domain registrar, add a DNS TXT record (name/host) as defined in the ‘DNS Validation’ page (note the underscore ‘_’ at the start) with the value as defined on the page
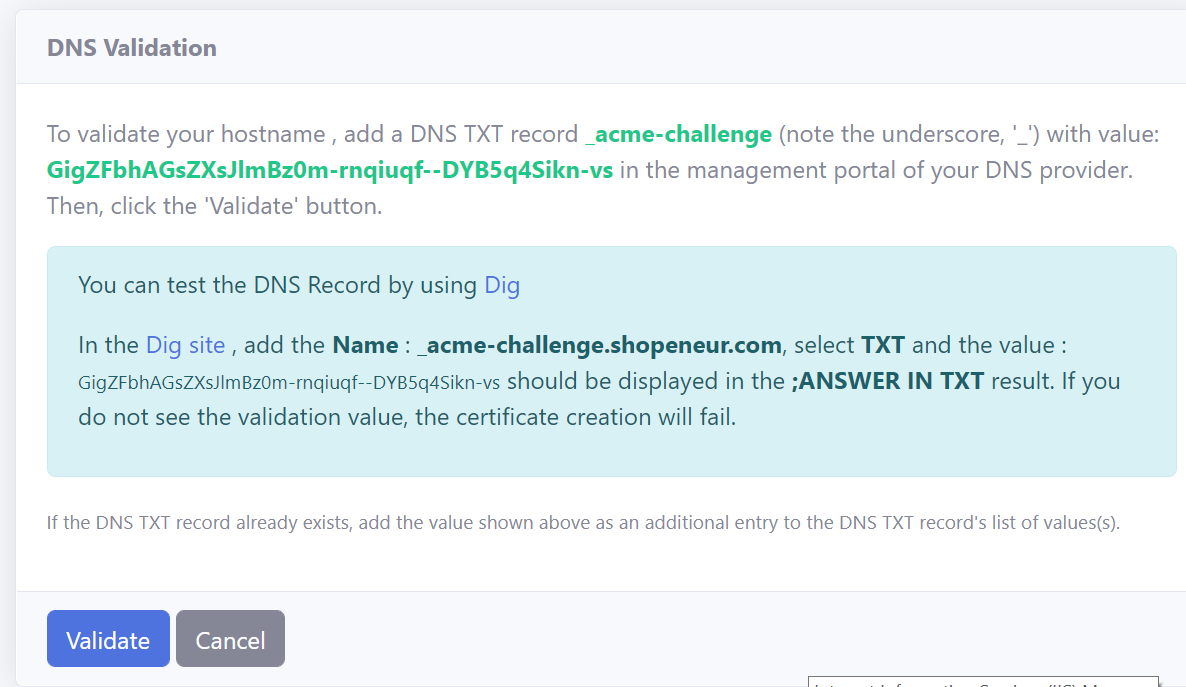
- This is an example of a DNS record
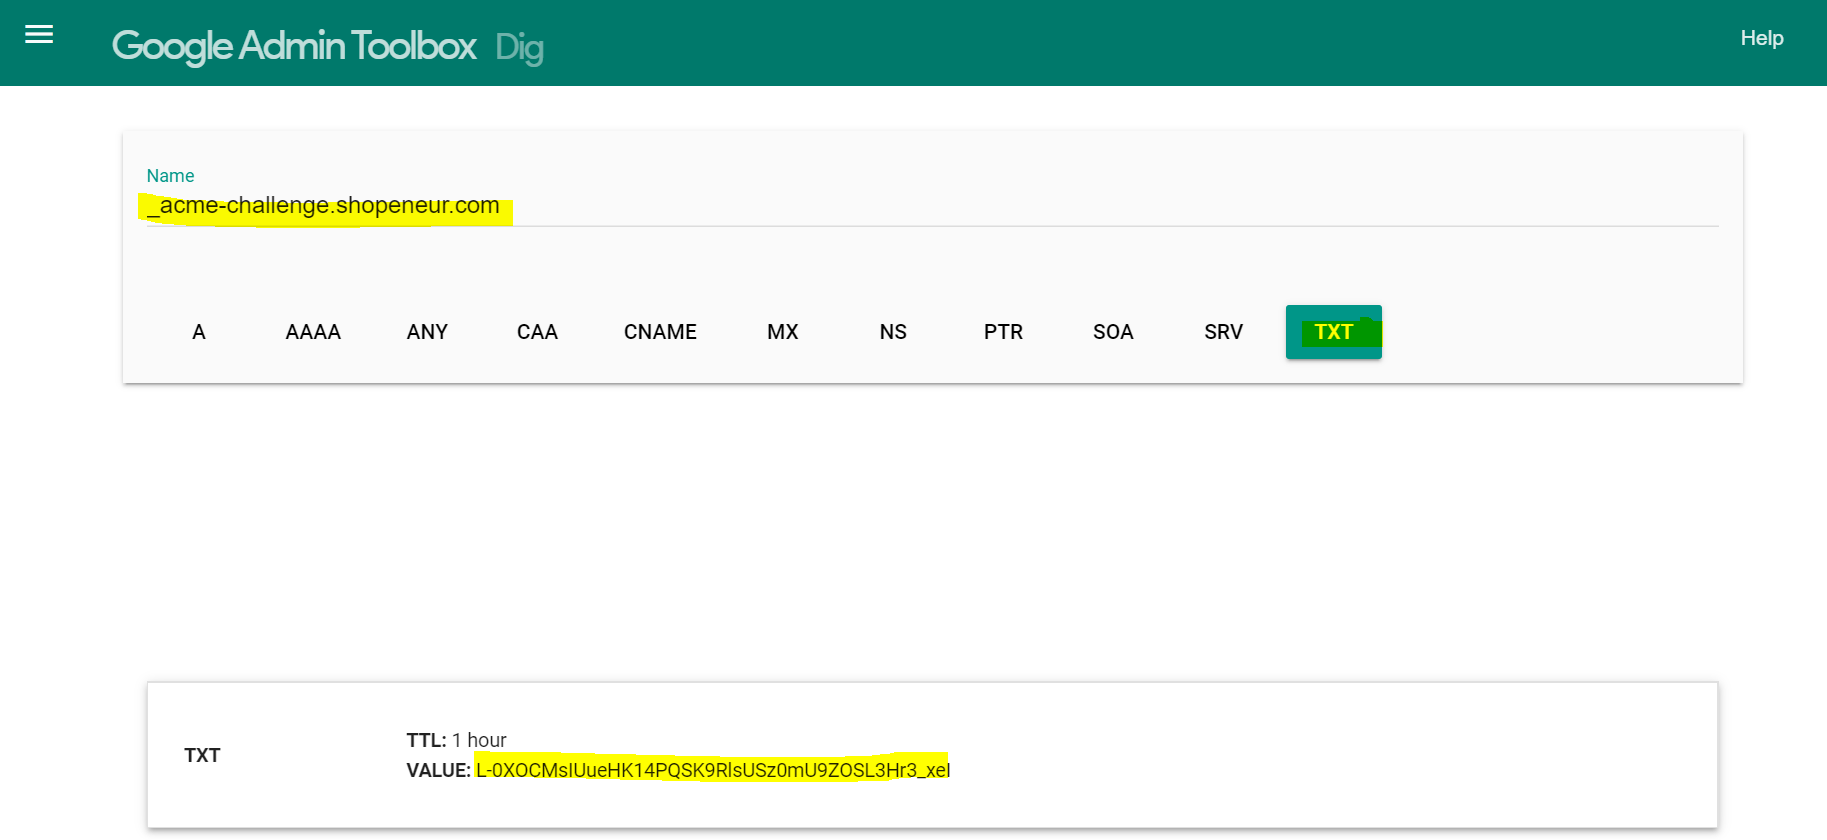
Verifying the DNS TXT Record with Dig
- You can test the DNS record in the Dig site. In the site, add the name identified in the DNS Validation page; and select the TXT record. The value for the record will be shown in the TXT section
-
If you see the correct DNS TXT record and value, the test is successful
-
If the test is successful, click the ‘Validate’ button.
Certificate Creation
- You will need to wait up to 10 mins to validate the site and create the certificate. When this is done, the SSL/TLS certificate will be displayed in the certificates list.
- When this is done, the SSL/TLS certificate will be displayed in the certificates list.
- You can download the SSL/TLS certificate or the relevant certificates files for installation in your webserver is the Certificate Details page.
Accessing the TLS/SSL Certificate
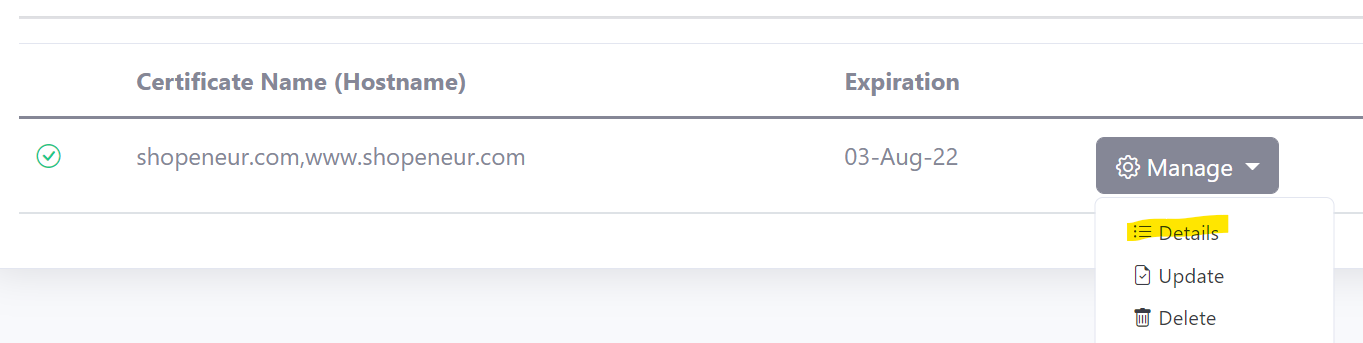
- To access the certificate, click the Details button in the Manage menu in the certificates list page.
- You can download the certificate in .PFX, .CER, .CRT or .PEM formats.

-
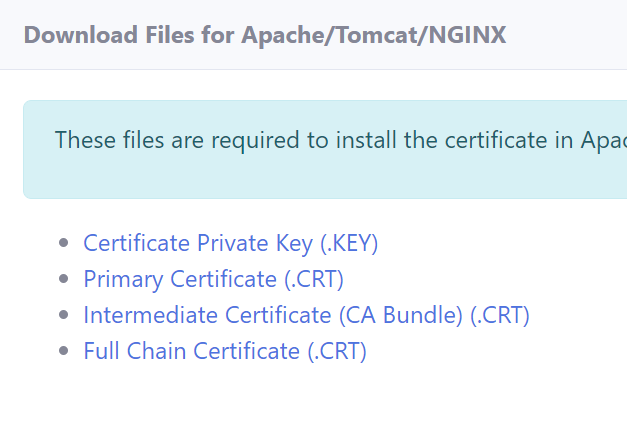
You can also download the Certificate files required for installation in specific web servers (Apache, Apache Tomcat, NGINX, etc). The files include :
- Certificate Private Key (.key)
- Primary Certificate (.crt)
- Intermediate Certificate (CA Bundle) (.crt)
- Full Chain Certificate (.crt)
Certificate Installation
You will need to manually download and install your certificate in your web server. The following links provides instructions on how to install the certificate in a web server
- Installing SSL/TLS Certificates in Web Servers and Hosting Services
- Installing SSL/TLS Certificates in Apache Server
- Installing SSL/TLS Certificates in Apache Tomcat
- Installing SSL/TLS Certificates in NGINX
- Installing SSL/TLS Certificates in IIS
Manually Renewing SSL/TLS Certificates
SSL/TLS certificates will expire in 90 days. You can manually renew a certificate by following these steps :
- Delete the old certificate
- Create a new certificate
- Remove the old certificate from the web server and install the new certificate
Rate Limits
There is a rate limit of 50 SSL/TLS certificates per subscription.
In addition, Let’s Encrypt has instituted rate limits to ensure fair usage by as many people as possible. To find out more about these rate limits please refer to the following link :